Exploring film simulations
In the prime days of analog photography, some photographic fims earned a legendary status. FujiChrome Velvia and Astia from Fujifilm, or Kodachrome from Kodak became big names. As a kid discovering photography as a hobby, I may have only had Agfa Vista and Kodak Gold to choose from at the local photo lab, but I sure did read about the others.
Now that we are into the era of smartphone photography, and digital cameras are often associated with vlogging, I think Fujifilm does an outstanding job marketing-wise by advertising "film simulation modes": color profiles that are applied directly by the camera to jpeg images. First, they (justifiably!) reached into their legacy as a film producer and named most of the modes after their famous films. I don't see any other brand making such obvious connections to their analog past. Second, they named these "film simulation modes". Not "filters" (that's a word associated with cheap effects from phone apps), but "simulations". Again, that's fitting – judging from promotional photos, the effects are well defined and yet balanced and subtle.
This kind of marketing I can respect. And when I decided to pick up a camera after a long break, I almost went with Fujifilm. Except that there is currently a waiting list for the model I wanted (probably due to chip shortage), and I went with Sony instead.
Which brings us to the next point. While Fuji might feature film simulation in their cameras, the whole idea of color grading, and more specifically film simulation exists independently. There are multiple collections of Hald CLUTs (color lookup tables) available online (some of them even paid). And while they can be used to impart various effects, some collections aim specifically to mimic the look and feel of classical films.
Imaging resource takes a deep dive into Fujifilm's film simulations and how they work. The plots of color shifts may look complex at first, but they were extremely well in showing the essence of the color transformation.
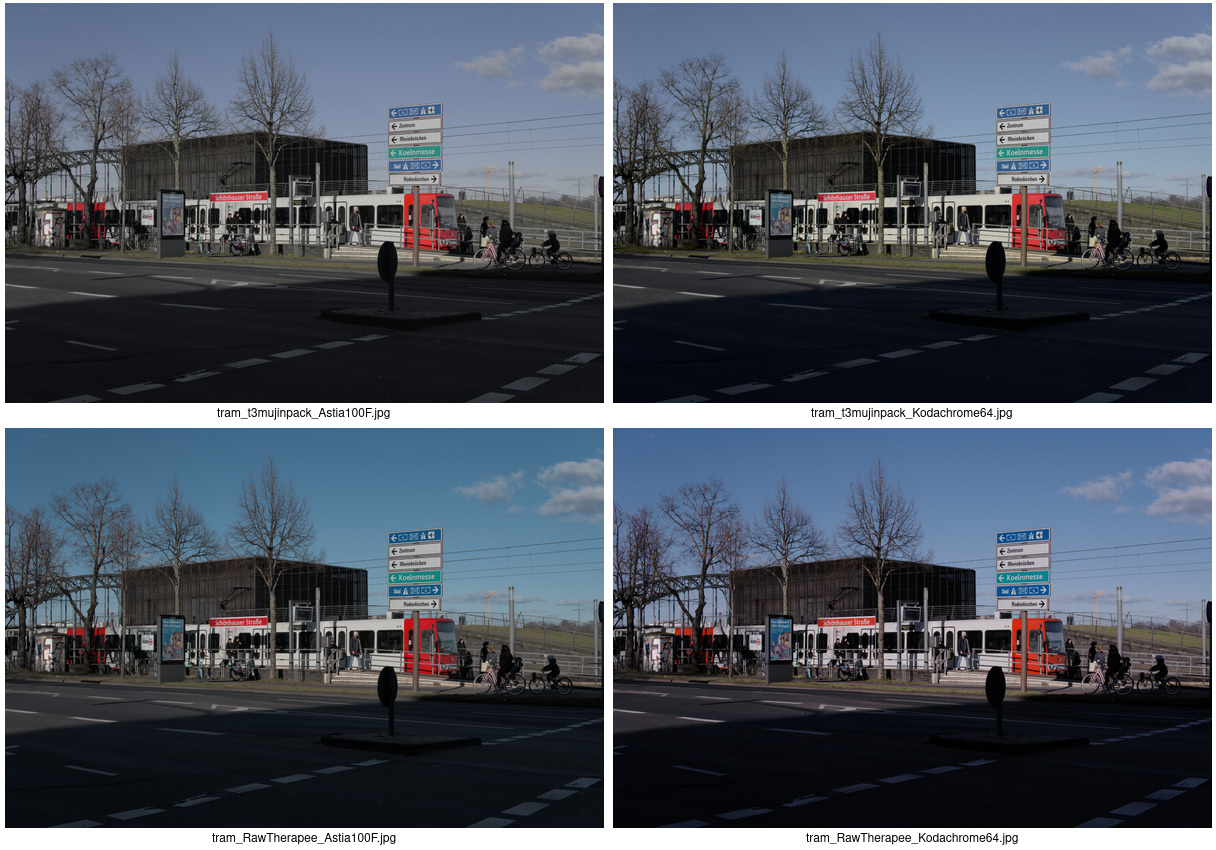
Ultimately, simulations are just that: simulations, and the end result will depend on the recipe used. I picked two sets of openly available CLUTs for myself: t3mujinpack by João Pedro Almeida, and RawTherapee Film Simulation Collection (see the second link for a wiki page with details and explanations). I then picked two photos, and selected two films (aestethics of which I very much like) for comparison: Astia and Kodachrome. Kodachrome might just be the most famous of them all. It was characterized by high contrast and vivid, and yet at the same time relatively subdued colors. Astia may not enjoy the same fame as Velvia (known for its almost pastel-like look), but it is more versatile and offers soft and slightly subdued color tones.
I used darktable to process the raw images. For each image, I only used darktable's default processing pipeline (which includes, among others, application of camera's white balance, and a small exposure correction), followed by application of CLUT through the "LUT 3D" option. I then exported the images to jpeg, and used imagemagick to resize and put them together. The results are below.


First, simulations do seem true to the character of the original: differences are stronger between film simulations than between packs. Second, the differences between packs are also clearly visible. Personally, I like the t3mujinpack versions better. I also lean slightly towards the Kodachrome look for these situations, but Astia also works excellently. Of course, that's subjective.